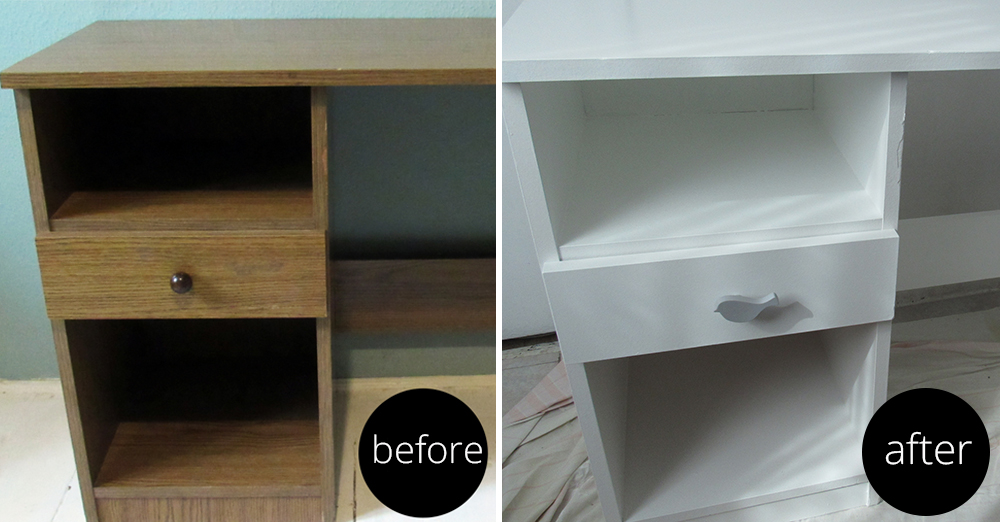
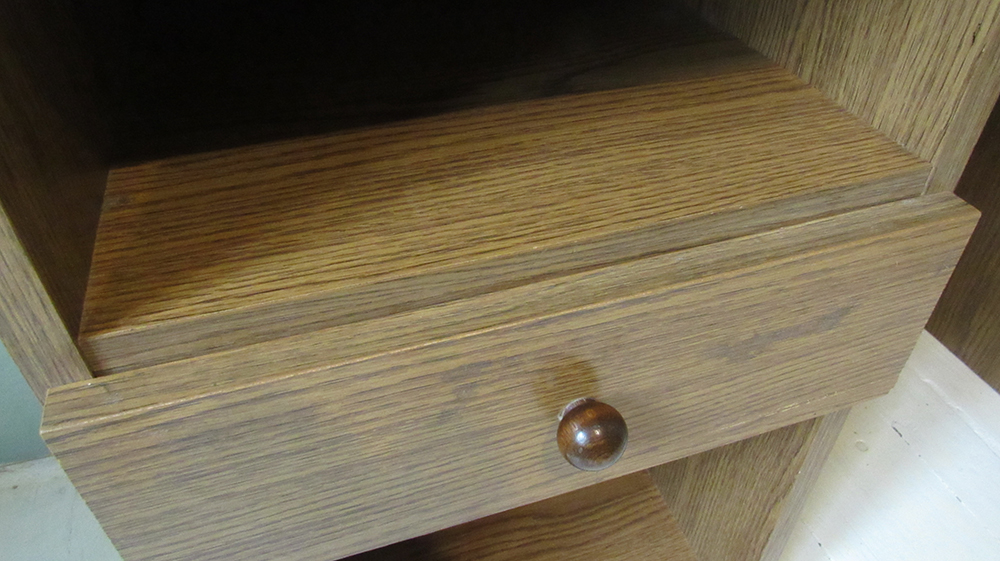
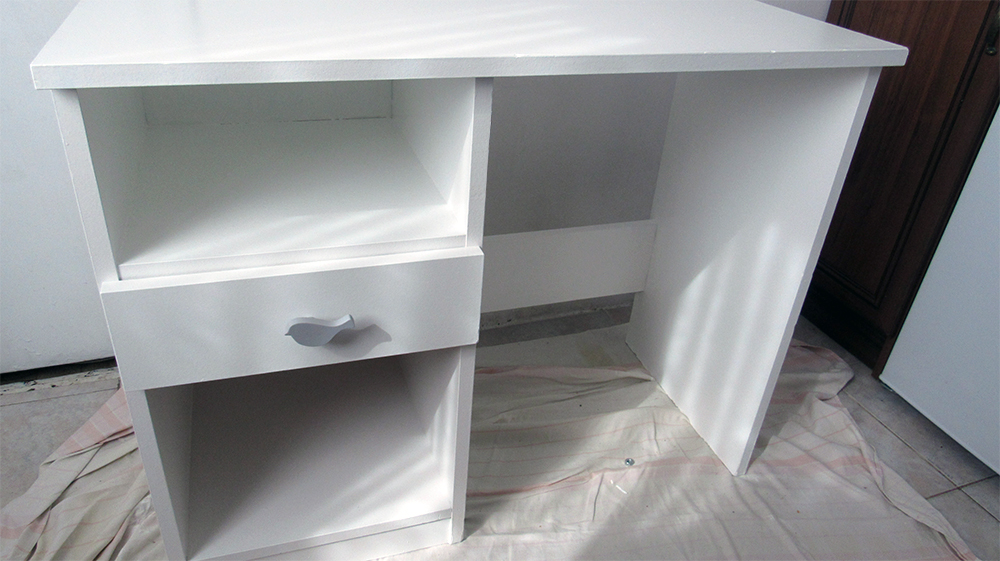
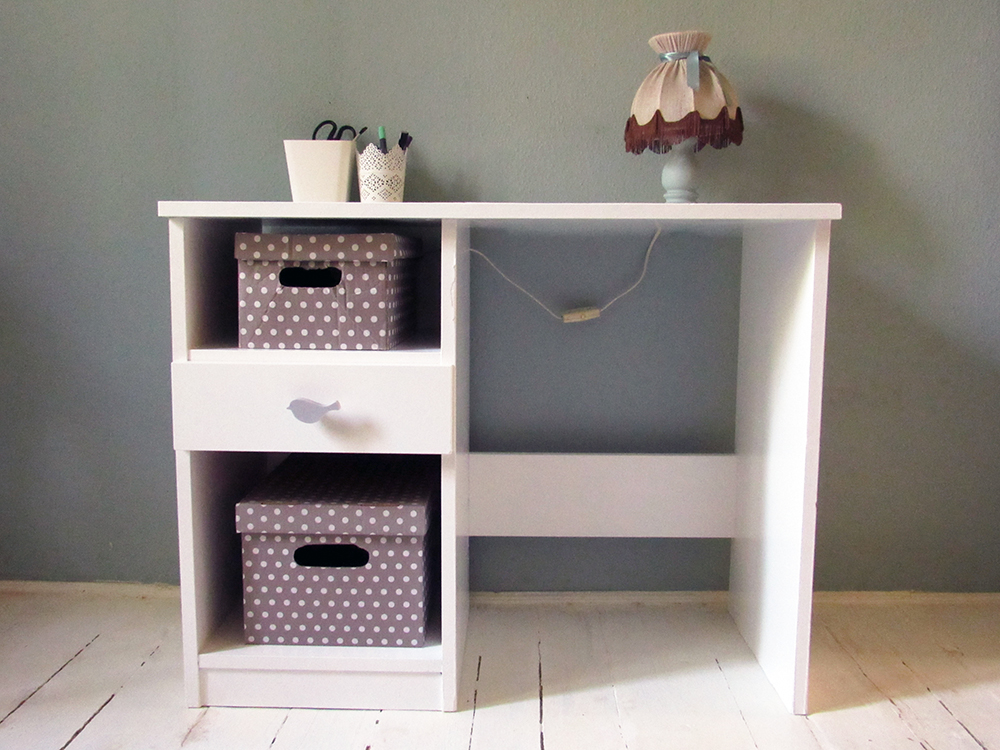
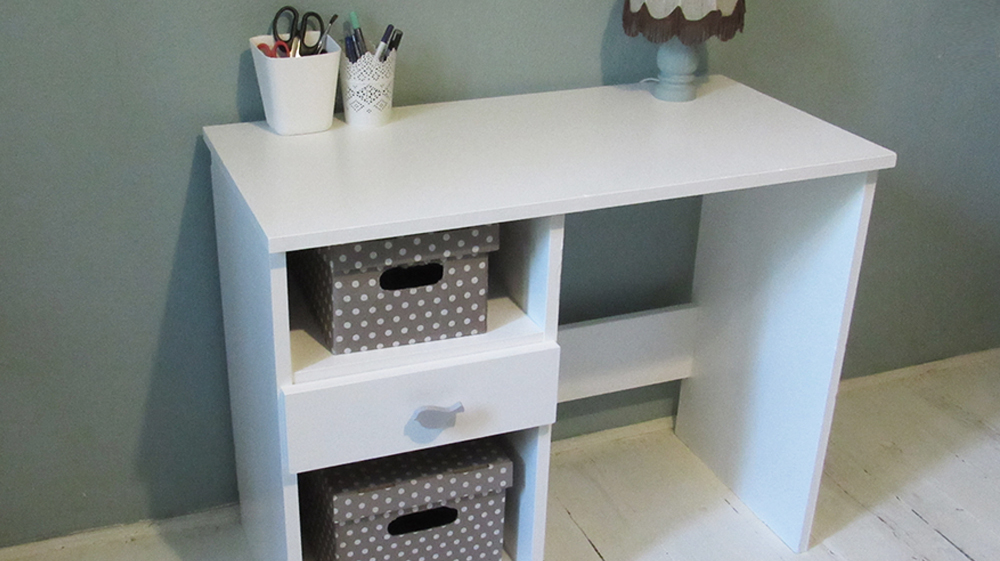
Today we're telling you about the renewal of a much-seen desk. It started its adventurous journey in the early nineties, in a child's bedroom, and has been around a few sublets thanks to its small size and easy portability. Before coming to us, it even served as a loaner in a friend's tiny home. It's made of furniture board, yet it's a durable and sturdy piece, made with the old technology of glue, but you have to admit that at the time, practicality rather than aesthetics ruled the day in everyday home furnishings. It would be against our principles to banish a still-usable object to the scrap yard, so we designed a new look - and we made it happen! For wooden furniture, repainting is an obvious solution, but for laminate furniture, it's a less straightforward solution. Still, we embarked on this exciting project because the material we chose promised to solve all our doubts. As our story shows, not without reason.
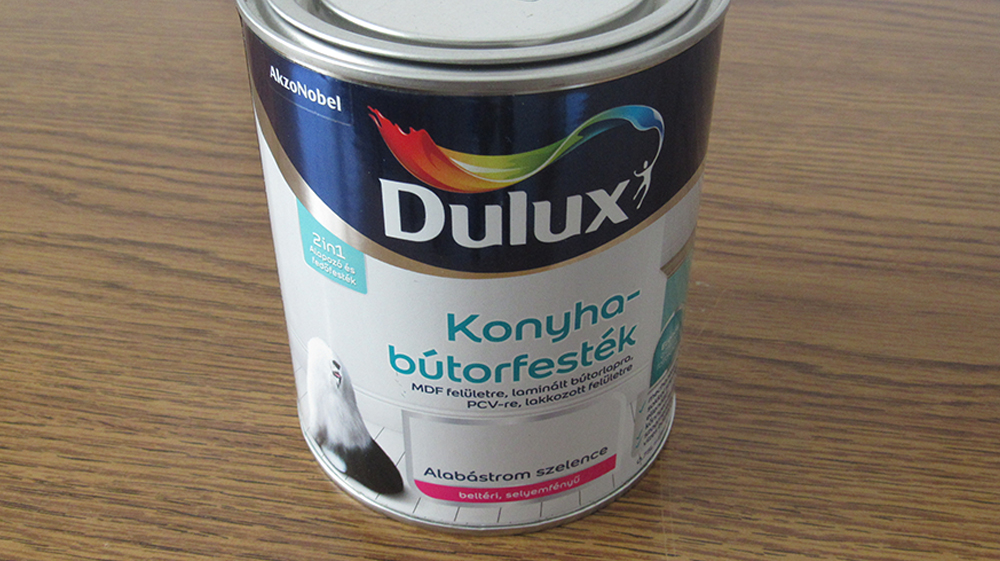
Another member of the Dulux Simply Refresh family, dedicated to DIY renovations, you may have already met in a previous post on tile painting. We redecorated a bathroom in just a few hours on a tiny budget - we thought it was a super result, so we thought we shouldn't be disappointed by trying out the furniture paint. Simply Refresh Kitchen Furniture Paint is a cost-effective yet eco-friendly solution if your kitchen furniture just needs a little spruce up. If you're saving up for your dream kitchen but want to refresh the look of your old one, or want to match the colour to the new colour palette of your home, or you're environmentally conscious about keeping your existing one or bought it second-hand, this material, which we've tested on the countertop, could be a great solution for you too.
xxx
Our video summary can help you get started with furniture painting, but we also describe the process in a few sentences.
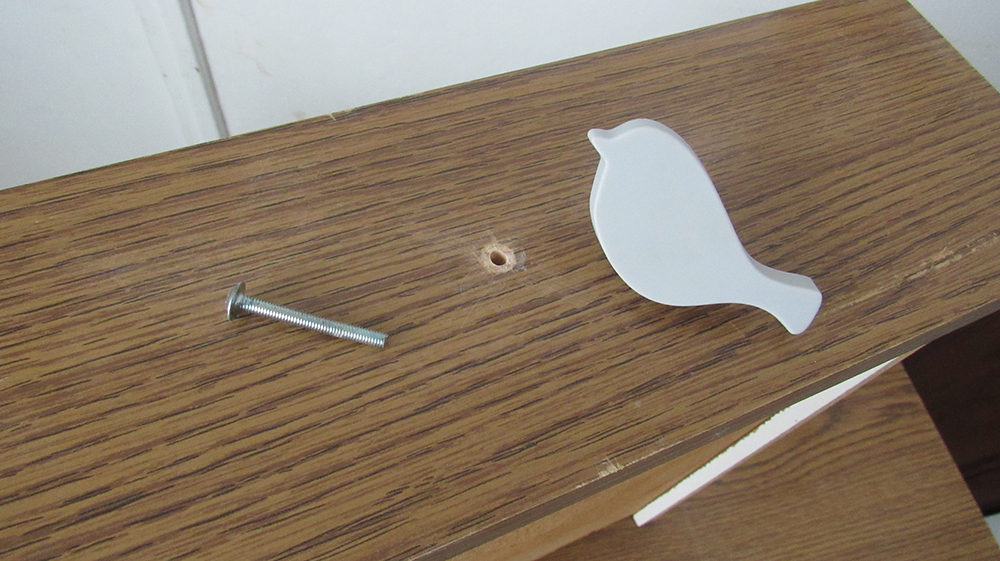
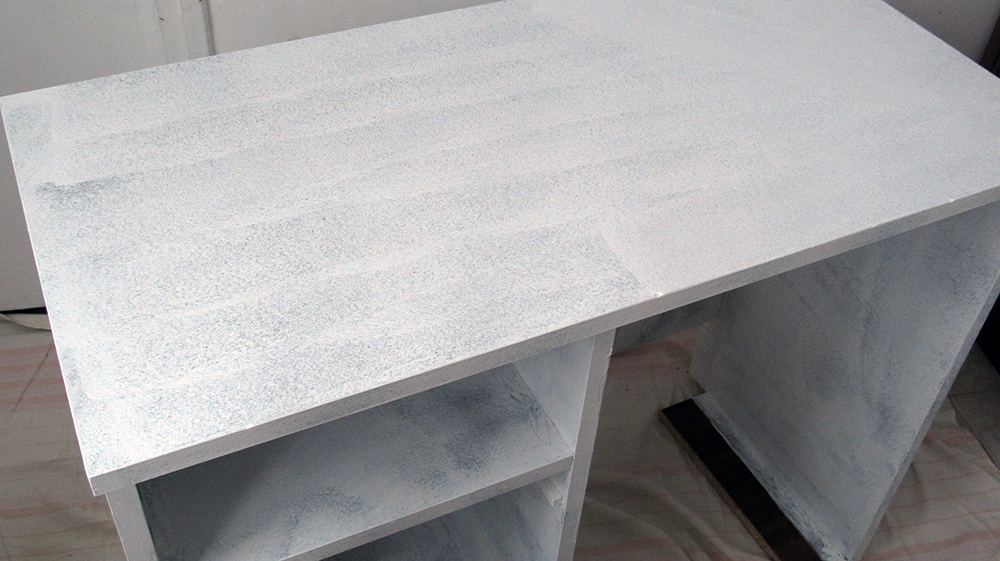
Remove the old, cracking layer of paint - if there is any! As with any paint job, it's essential that the surface is solid, clean and dry. The easiest way to degrease is to wipe with a dishwashing sponge. Use fine-grit sandpaper to matt the surface, then dust it! Apply the paint with a flock roller, waiting six hours between coats to set! Two coats were enough to get our table to its original dark brown colour, even though it didn't look at all confident after the first one.
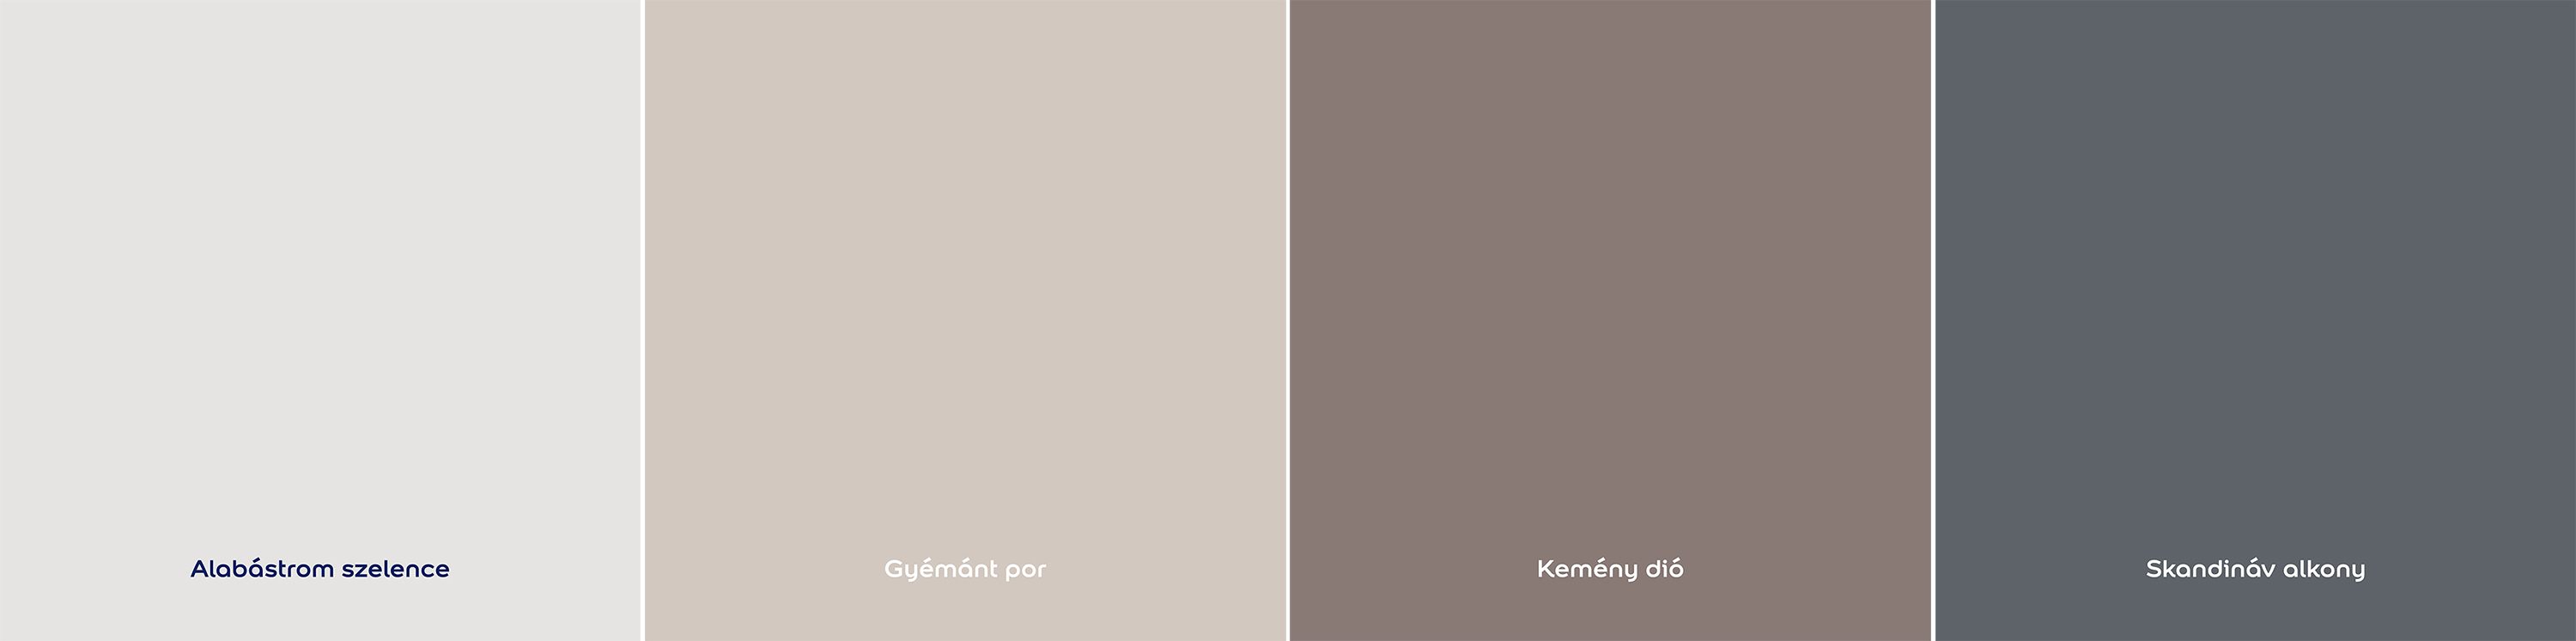
The paint dries quickly, but can only be fully used after 10 days, so you need to protect it from scratching and avoid scratching it! After that, however, you get a smooth, durable, silky finish that is resistant to greasy dirt, mild detergents and perfectly colourfast. You can re-design your furniture in the following trendy colours.
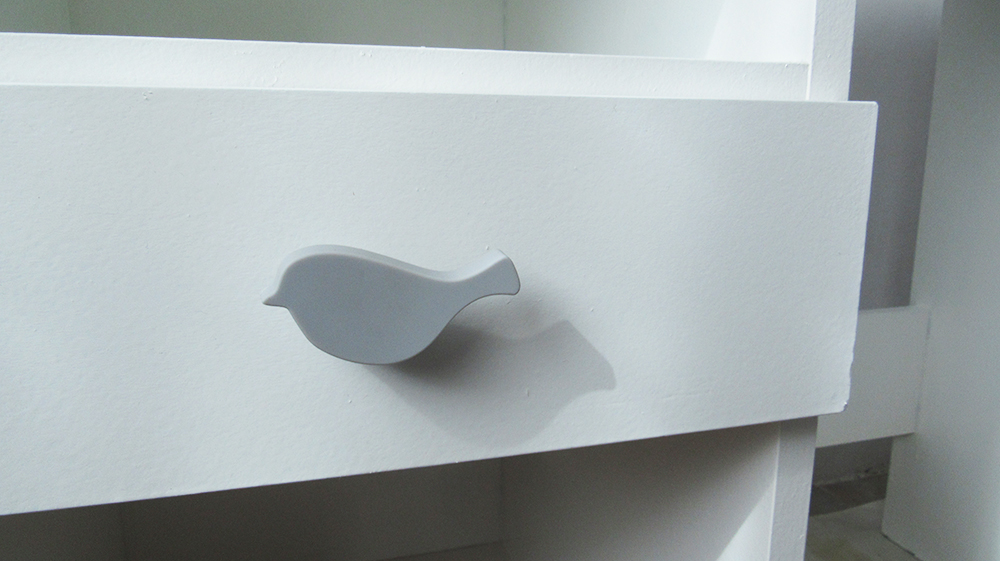
Our little table has been given a new look to match the mood of our nursery, and given that the new owner is less than two years old, we can use it for many years to come. It's certainly the right size for a toddler, and if it gets covered in crayons or the design of the nursery changes, we'll just repaint it again!
You can find our most recent posts on the results of small and large DIY renovations HERE. If you liked this article, follow us on Facebook and Instagram to make sure you don't miss the next one!
Ajánlott bejegyzések:

A bejegyzés trackback címe:
Kommentek:
A hozzászólások a vonatkozó jogszabályok értelmében felhasználói tartalomnak minősülnek, értük a szolgáltatás technikai üzemeltetője semmilyen felelősséget nem vállal, azokat nem ellenőrzi. Kifogás esetén forduljon a blog szerkesztőjéhez. Részletek a Felhasználási feltételekben és az adatvédelmi tájékoztatóban.